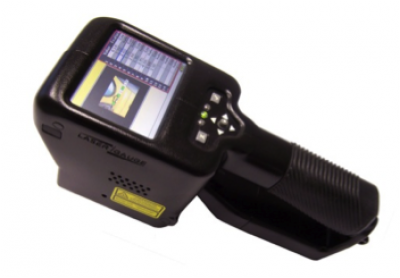
With unique Cross-Vector scanning technology, the HS761 provides more surface information around the edges of surfaces than any other handheld laser profiler. It is used primarily for measuring the gap and flush between assembled panels.
The HS761 sensor is a complete measurement system. No external components are needed. Utilizing a powerful 1GHz processor, measurements take less than two seconds. The 3.5” color display provides detailed graphics of plotted surface profiles, and the touch screen allows for easy menu navigation and expanded graphic functions.
Cross-Vector Scanning – Traditional laser profilers utilize a single laser stripe coupled with a single imager to capture surface scans. But a single view cannot see surface points around the radius on the edge of the gap. The Cross-Vector sensor utilizes multiple lasers and multiple views at crossing angles. This allows the sensor to see around edges of the radius to the vertical tangent and beyond. The result is a complete surface profile and the most accurate gap measurements.
Color Display – The3.5” high resolution color LCD provides graphical and textual information before, during and after the scanning. The surface profile is plotted in real-time and the measurement results are instantly written to the data table. Results are color coded for immediate identification of out-of-spec conditions.
User Interface – The touchscreen is used to navigate menus and access on-screen functions, or the 5-way joystick and two keypad buttons can be used to perform all the same operations without having to use a second hand. Color LED’s on the top and the underside of the sensor provide feedback on sensor positioning, scan completion, and scanning errors. Menus can be displayed in selected languages and measurements can be expressed in inches or millimeters.
The sensor has an integral barcode reader that can be used to scan a VIN or other identifying number as a means of providing traceability of the measurements to the part or assembly being inspected.
Routine and Gauge Modes – Inspection routines developed using the LGWorks software can be run directly on the sensor. Detailed graphics and on-screen messages guide the inspector from one measurement to the next. Complex calculations referencing measurement data can be processed in the routine and included in the data file.
The Gauge Mode uses one algorithm to take the same type of measurement on different parts, much like a GO/NO GO gauge. Pan and Zoom functions allow for detailed analysis of the plotted scans. Data is written to a table and saved automatically. Scans of each measurement can also be saved.
Wireless Communications – Data files and scan files that have been saved on the sensor can be retrieved wirelessly using the integral 2.4GHz ZigBee module to a matching USB stick plugged into a local computer. When connected by a USB cable to a computer, the sensor is mapped as a USB drive and files can be dragged and dropped for easy transfer.
Power – A rechargeable, lithium-ion battery provides power for two or three hours of constant operation. Power saving functions can be used to extend operating times even longer. Files are constantly saved, so data is never lost. The on-screen fuel gauge and a “low battery” message informs the operator when it is time for a fresh battery.
Complete Surface Profile – The Cross-Vector approach captures surface profiles around edges and down into the gaps. This results in the most complete surface profile and most accurate measurements.
Speed – The scanning process is completed, measurements calculated, results displayed in the data table, and the scan plotted on the graph, all in less than two seconds.